Class Flow
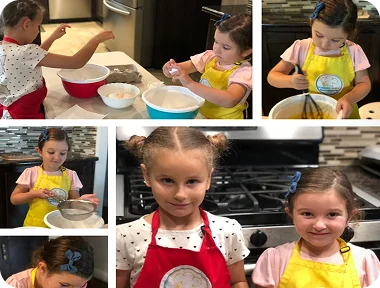
Exploring Dry Ingredients
Children help:
• measure and pour flour, sugar, salt, baking powder, and baking soda,
• notice differences: flour is soft, sugar is grainy, cocoa is dark and smells rich (you can show cocoa later when coloring the batter),
• whisk dry ingredients together, watching powdery textures blend.
This is a good moment to talk about “dry vs. wet” ingredients and why they are mixed separately.
Mixing the Wet Ingredients
In a separate bowl, the educator models:
• cracking eggs (older children can try this with support),
• adding milk, oil, and vanilla,
• gently whisking until smooth.
Children can:
• help pour milk and oil carefully,
• smell the vanilla, describing its aroma (sweet, warm, cozy),
• observe how the mixture changes from separate parts to one liquid.
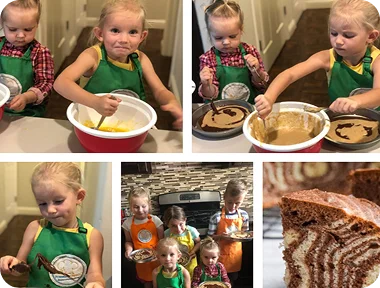
Combining Wet and Dry — Making Batter
Now the “magic of mixing”:
1. Slowly add the wet mixture into the dry ingredients.
2. Show the children how to stir gently so flour disappears but batter stays soft and smooth.
3. Talk about lumps and how stirring helps them go away.
You can ask:
• “What happens when flour and milk meet?”
• “Is the batter thicker or thinner than milk?”
Older kids can take short turns mixing under supervision, practicing controlled, gentle movements.
Creating Two Colors: Vanilla and Chocolate
1. Divide the batter into two bowls.
2. Keep one bowl vanilla.
3. In the second bowl, add cocoa powder.
4. Let children watch how the cocoa gradually turns the batter light brown → darker chocolate as you mix.
Invite them to:
• describe colors,
• compare smells: vanilla vs. chocolate,
• predict which batter will show more in the stripes.
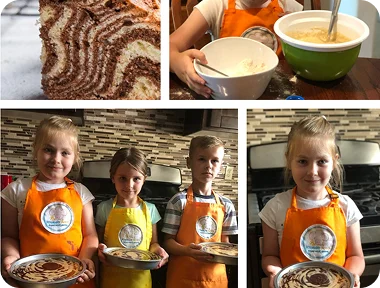
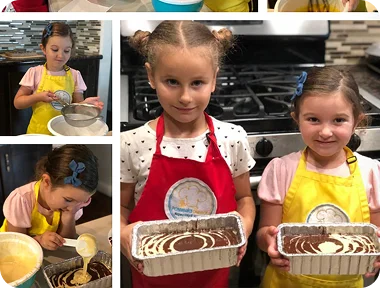
Pouring the “Zebra” Pattern — the Highlight
Set the greased cake pan in the center and explain the pattern game:
1. Add 1 tablespoon of vanilla batter to the center of the pan.
2. On top of that, add 1 tablespoon of chocolate batter.
3. Repeat: vanilla → chocolate → vanilla → chocolate…
As children take turns:
• they practice sequencing (“What comes next?”),
• pouring with precision into the middle,
• watching circles grow and spread outwards like ripples.
From above, the cake looks like a striped target or tree rings — you can point this out as a visual connection.
Baking and Waiting
The educator places the cake in the oven. While it bakes, you can:
• talk about what heat does to batter,
• ask children to guess what the inside might look like,
• read a short story about animals with stripes (zebra, tiger) or patterns in nature (tree rings, snail shells).
This waiting time is great for calm discussion and imaginative thinking.
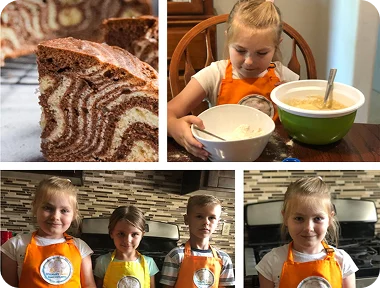
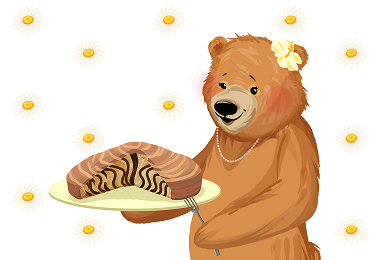
Cooling, Slicing, and Pattern Discovery
Once the cake is baked and cooled:
1. Show the class the top: it may have soft marbling or a gentle dome.
2. Carefully cut the first slice while everyone watches.
3. Turn the slice sideways and reveal the stripes.
Invite children to:
• describe what they see: circles, waves, swirls, lines;
• compare slices: “Do they look the same or different?”;
• choose their favorite pattern — some might see shapes or pictures in the stripes.
Serve small pieces and let children enjoy their “art you can eat.”
Notes & Creative Extensions
• Make mini zebra cupcakes or muffins so each child can have an individual pattern.
• Let kids draw their cake cross-section on paper, trying to copy the stripes.
• Use toothpicks on top before baking to gently swirl part of the batter, showing a different marbling technique.
• Connect with math: count spoonfuls, talk about “first, second, third,” or explore AB-AB patterning (vanilla–chocolate–vanilla–chocolate).
• Tie into a nature theme: patterns on animals (zebra, fish, butterflies), wood rings, or stones.
Perfect For Educators
• Preschool teachers
• Kindergarten classrooms
• Early-childhood centers
• Montessori / Reggio Emilia programs
• Homeschooling families
• Cooking clubs
• After-school programs
• Weekend family workshops
Skills Developed:
alternating and sequencing, pouring with precision, fine-motor control, understanding wet vs. dry ingredients, color and pattern recognition, turn-taking, patience, observing changes during baking, language development through describing patterns and textures.


 ICONIER Digital Agency